ELECTRICAL INSTALLATION
ELECTRICAL
Review the information below before you begin:
- Connect the 4″ Bubbler LED Light Module (25503-460-900) to a 12V AC transformer. Listed, outdoor-rated 12VAC transformer must be used.
- Be sure the transformer’s wattage and amperage are not exceeded by the total wattage and amperage in use (load).
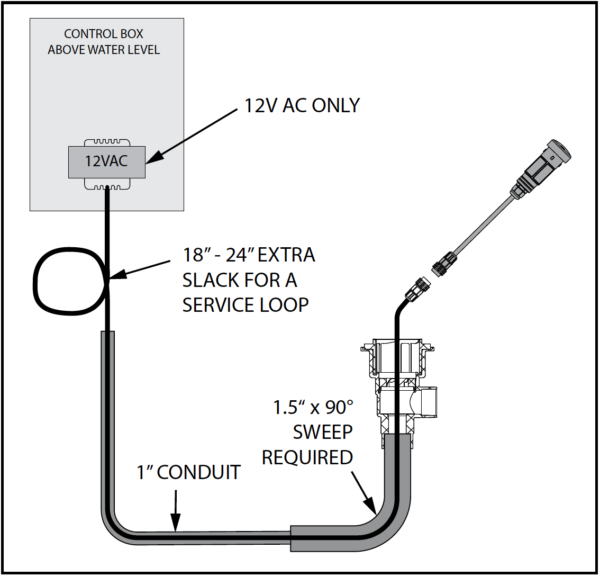
- A minimum of one (1.5″ x 90°) sweep or 12″ of straight conduit must be installed into the electrical socket on the bottom of the 4″ Bubbler.
- The LED Light Module final operating depth must be at least 2″ underwater.
Use sweeps only – no 90° bends – in the electrical conduit line.
TRANSFORMER CONNECTION
CONNECT THE TRANSFORMER
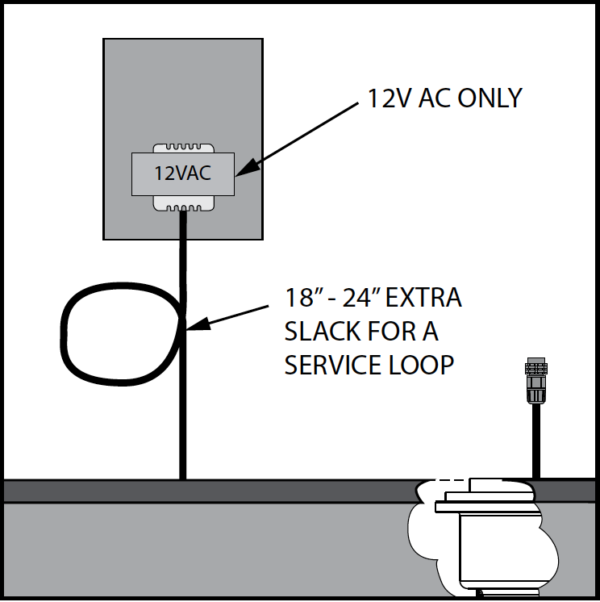
Run the supplied electrical cable through the conduit outlet of the wall to a 12VAC transformer, leaving 18″- 24″ of service loop at the control box.
Cut off excess cord as needed.
APPLY O-RING LUBRICANT
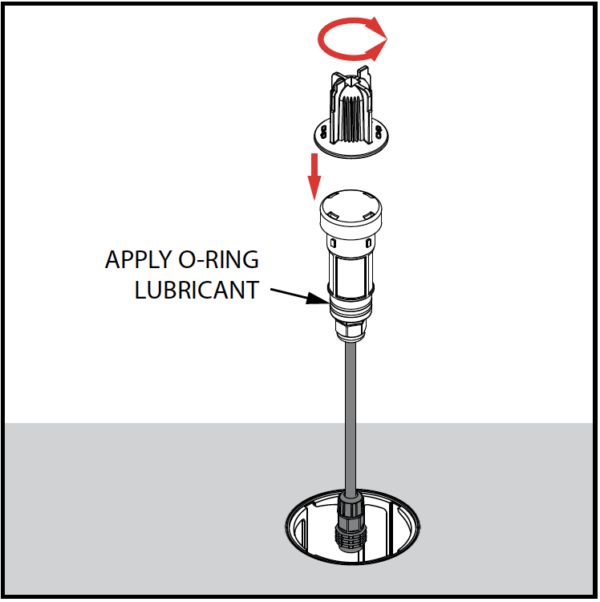
Before installing the LED module, apply O-ring lubricant to the bottom of it.
Use the Installation Tool to install the LED module. Insert the four snaps on the Installation Tool into the four snap receptors on the small LED lens.
Rotate clockwise until you feel a “click” and the light module stops rotating.
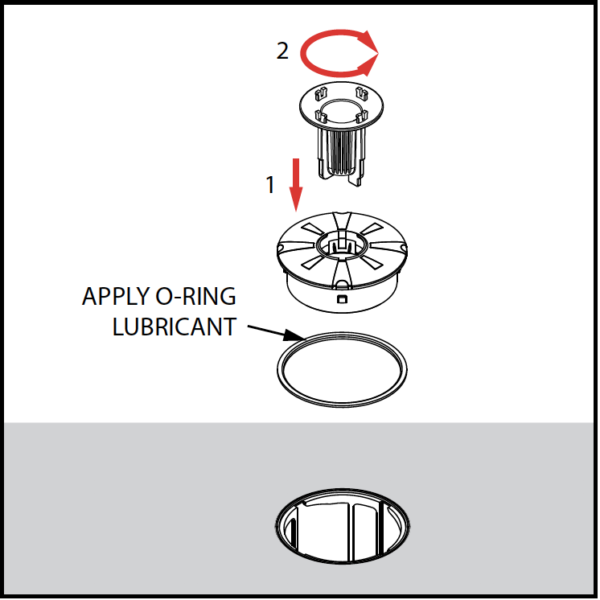
INSTALL THE L-GASKET
Install the L-gasket making sure it is seated properly in the groove.
Apply O-ring lubricant to the top of the L-gasket.
Use the Installation Tool to install the large lens. Insert the top of the installation tool into the eyeball cavity like a key.
Rotate clockwise until you feel a “click” and the lens stops rotating.
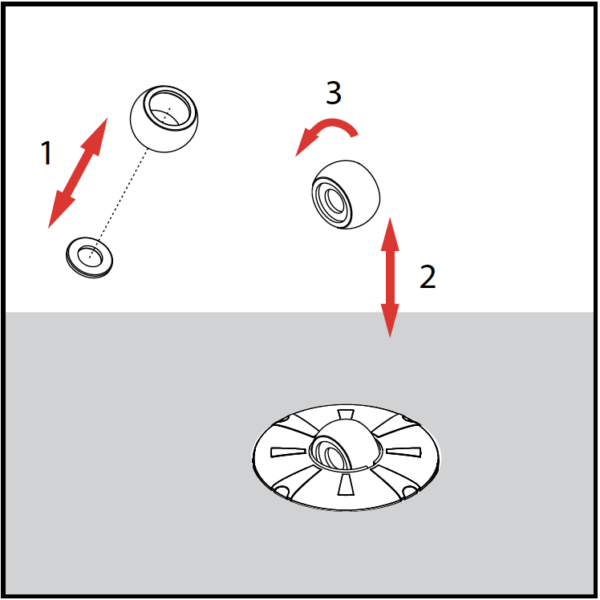
INSTALL ORIFICE & EYEBALL
To install the orifice and eyeball, first insert the orifice disk into the eyeball. You can use the Stopper Assembly to do this.
Now rotate the eyeball 90° and insert it into the opening of the large lens.
Then, rotate the eyeball again to the desired position.
![]()
Congratulations!
You have completed this chapter. To go to the next chapter, click next. To go back to the Chapter Table of Contents, click done.