flush finish installation
CHOOSE YOUR INSTALL
![]()
NOTE: All installation steps are the same for vinyl/fiberglass and gunite installs. However, the adjustable collar comes pre-glued from our factory for vinyl/fiberglass units.
gunite

VINYL/FIBERGLASS
Prep the location by using a 3.5″ hole saw to cut a hole in the desired location.
Then, using the included paper template, drill 6 holes using an 11/64 drill bit.
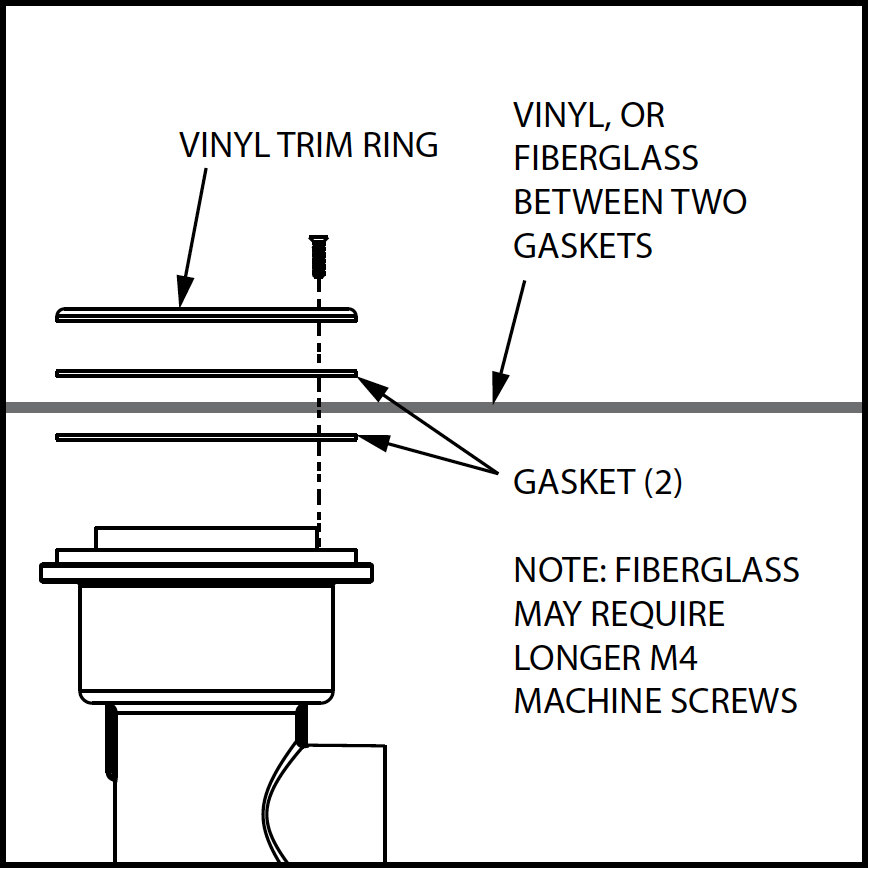
INSTALL GASKETS & BUBBLER UNIT
Install one gasket under the vinyl or fiberglass, and one on the water side. Then, secure the bubbler to the vinyl/fiberglass shell using the Trim Kit.
VINYL LINER KIT PART LIST:
- (1) Decorative Ring
- (2) Gaskets
- (6) M4 Stainless Steel Screws
- (1) Cutting Template
NOTE: Secure the Vinyl Trim Ring with the (6) M4 Stainless Steel Screws included with your Vinyl Liner Kit. Fiberglass installation may require longer M4 Stainless Steel Screws (not included).
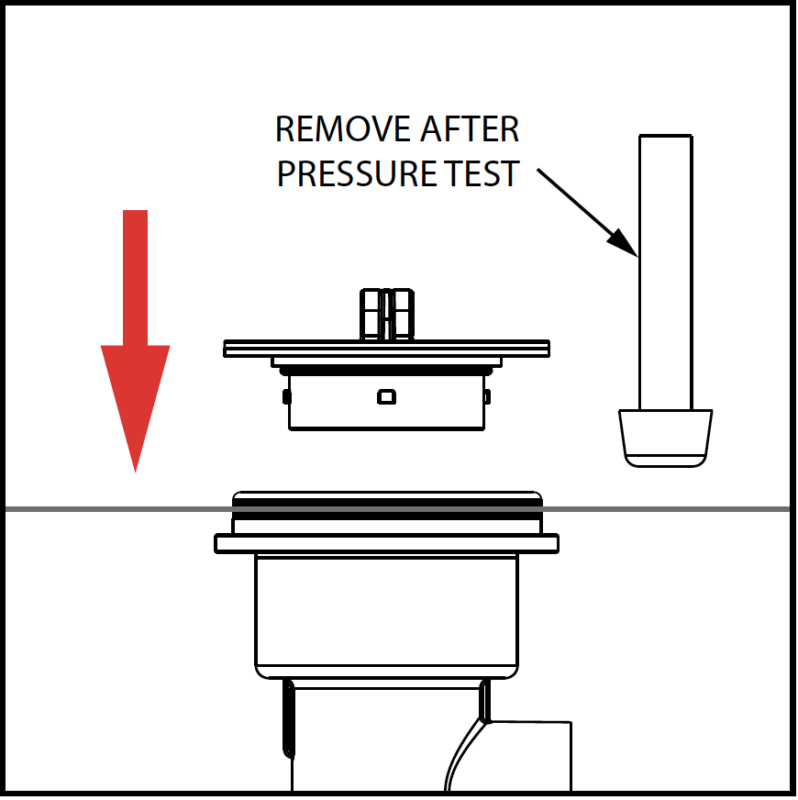
PRESSURE TEST
To pressure test, install the Pressure Test Cap and O-Ring into the bubbler.
Rotate clockwise until it stops.
Now, pressure test the unit.
Then, remove the cap and stopper.
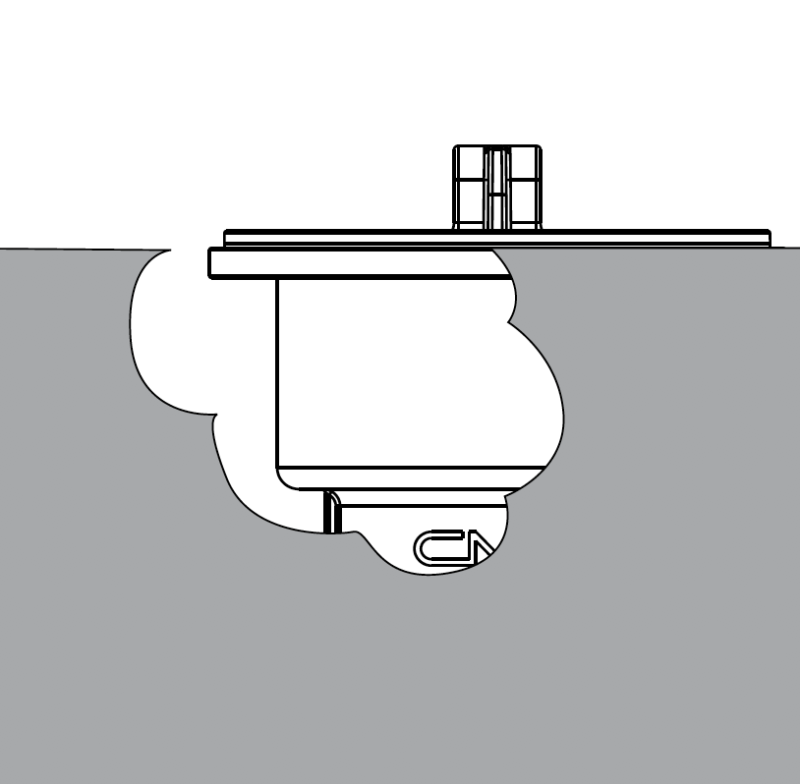
INSTALL GUNITE
Remove screws and nuts.
Then, remove the Pressure Test Cap and use it as a debris guard while installing gunite.
Install concrete/ gunite to top of the unit (up to flange of the Main Body).
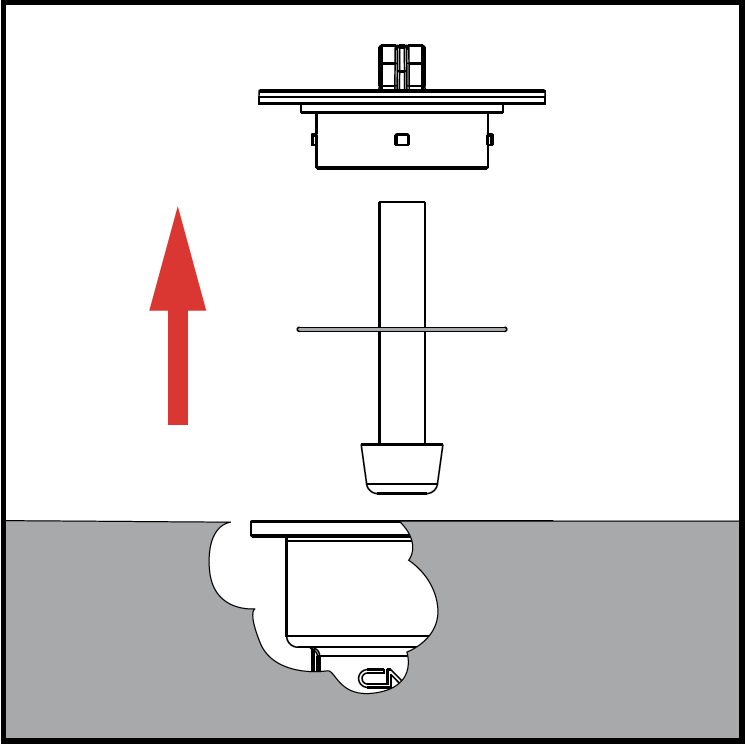
REMOVE PRESSURE TEST PARTS
Remove Pressure Test Cap, pressure o-ring, and the stopper assembly.
INSTALL FLOATING COLLAR
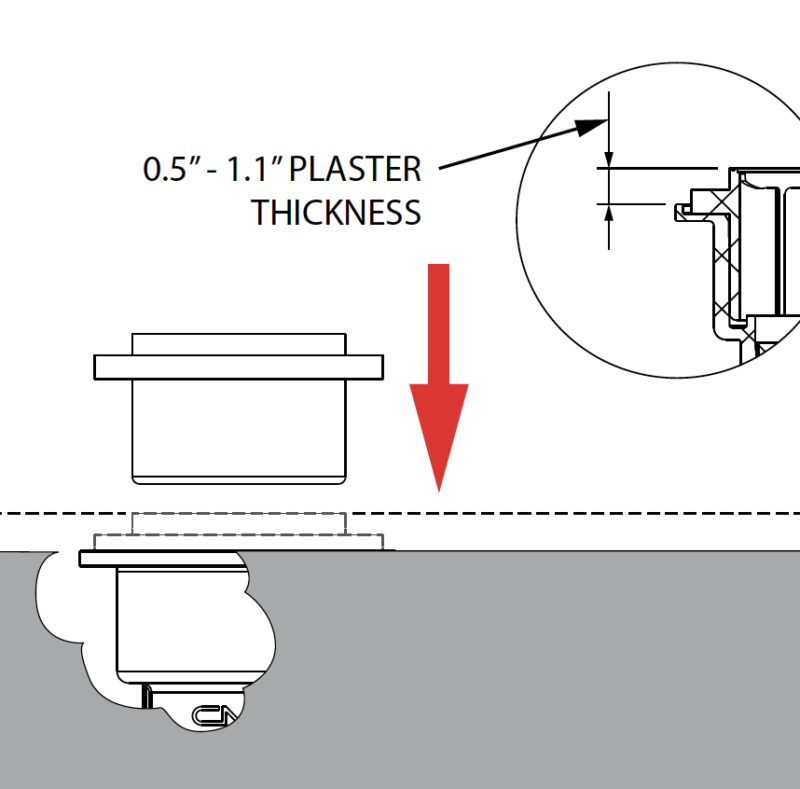
Determine the finishing height of the plaster.
Use PVC glue and install the Floating Collar with plaster height slightly below the top of the collar.
NOTE: The Floating Collar is designed to allow up to 0.5″ of adjustability before gluing, to better match the final plaster height.

INSTALL PLASTER
Replace the Pressure Test Cap as a debris guard.
After the glue dries, install plaster to just below the top of the Floating Collar.
![]()
Congratulations!
You have completed this chapter. To go to the next chapter, click next. To go back to the Chapter Table of Contents, click done.