Water Operation
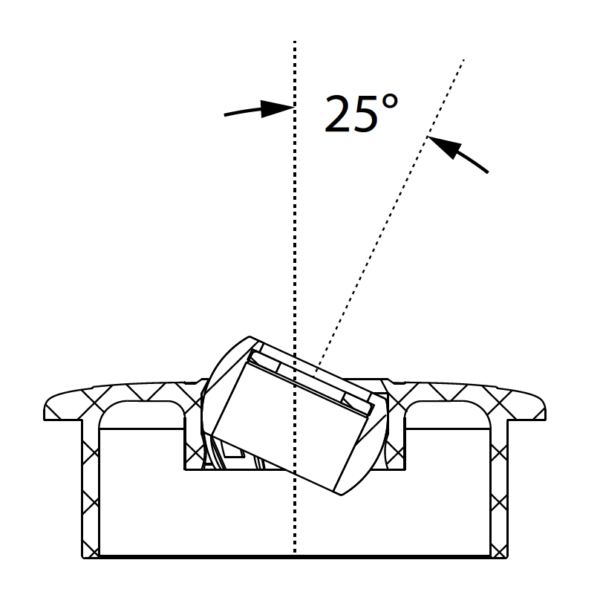
ADJUSTING THE EYEBALL
The adjustable Eyeball can be angled up to 25° from a vertical position.
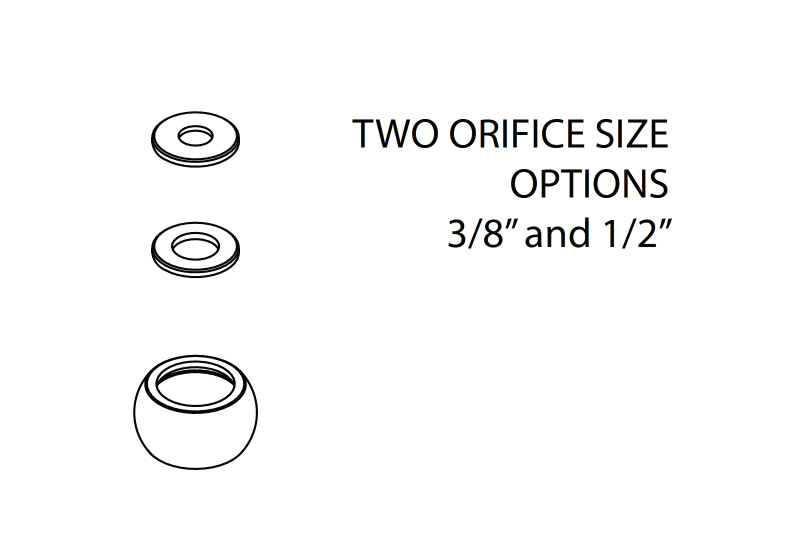
ORIFICE OPTIONS
There are two orifice sizes included with your 4″ LED Bubbler:
3/8″ and 1/2″
- A smaller orifice opening (3/8″) will have higher water pressure and plume height
- A larger orifice opening (1/2″) will have lower water pressure and plume height
The flow control valve can be adjusted to meet the desired performance.
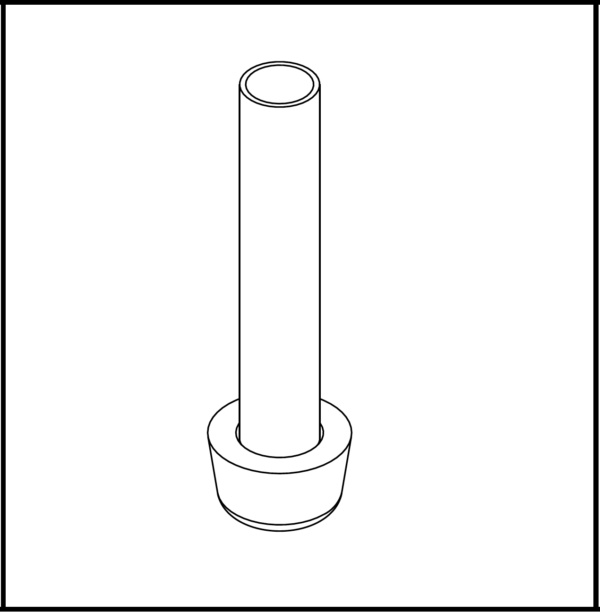
USING THE STOPPER ASSEMBLY
NOTE: The Stopper Assembly can be used for installing the Orifice Disk.
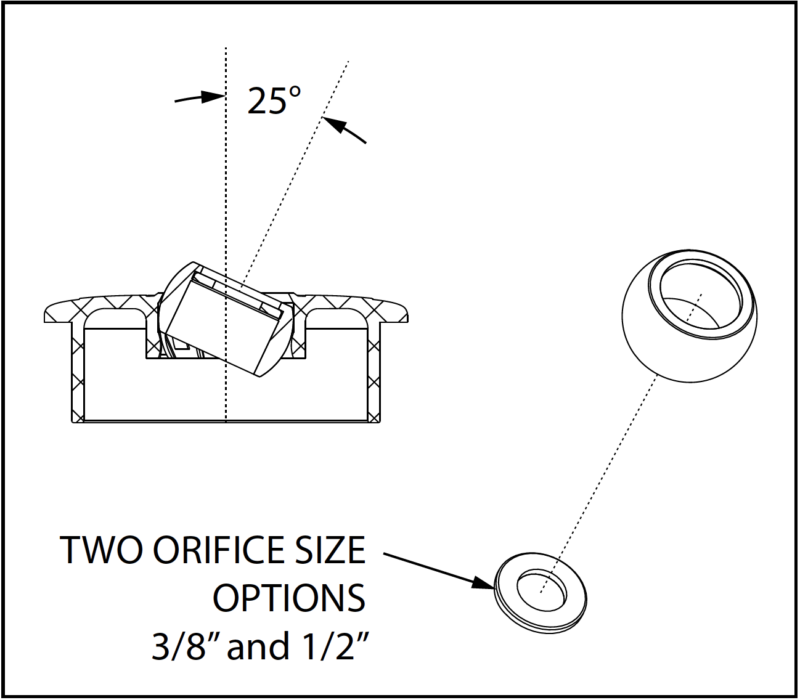
THE ORIFICE DISK
The Orifice Disk snaps into the Eyeball (see diagram).
Use the smaller end of the Stopper Assembly to gently push the Orifice Disk into the Eyeball.
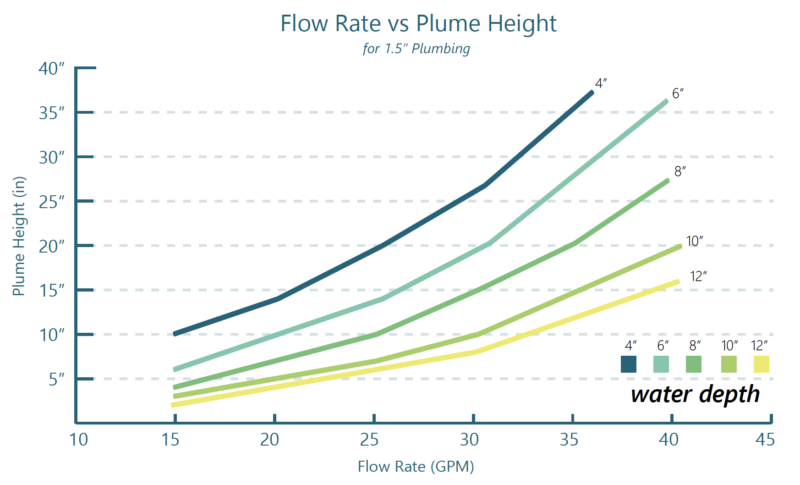
PERFORMANCE CHART
Factors such as water flow rate, orifice size and water depth above the orifice will all contribute to the final look of the plume height. The performance chart below can be used as a reference in deciding how to install your 4″ Bubbler.
NOTE: Results may vary.
![]()
Congratulations!
You have completed this chapter. To go to the next chapter, click next. To go back to the Chapter Table of Contents, click done.