Foundation: Preparation & Setting
Forming the Foundation
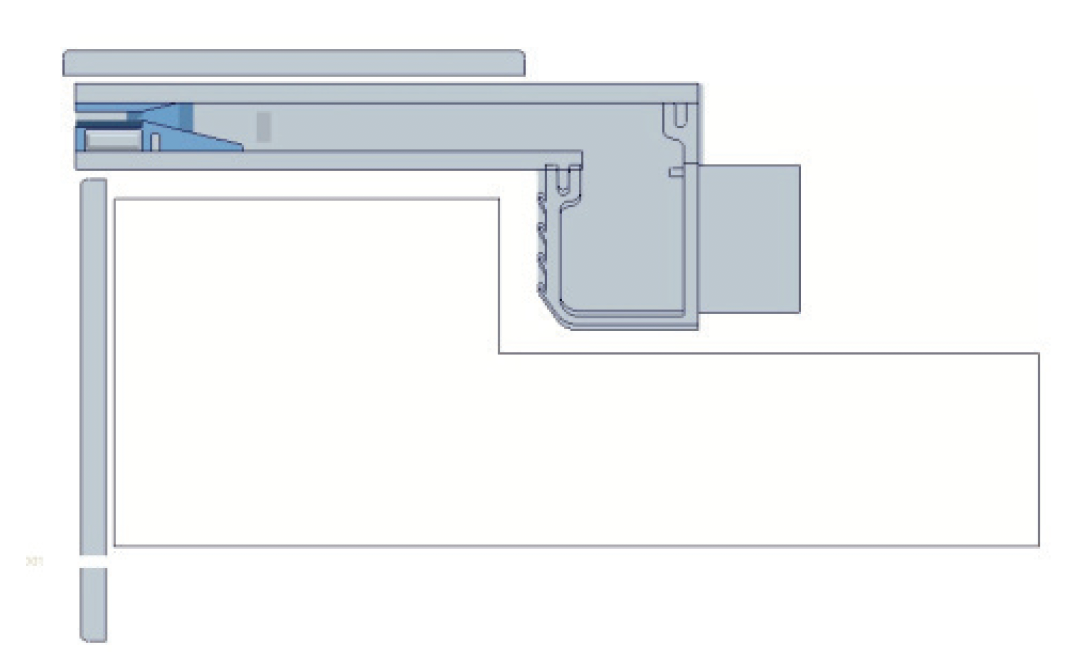
Because of the 6” Lip, the waterfall must be installed and supported further back into the substrate.
This lip must be fully supported and is recommended to be installed with the lip a minimum of 1/8” overhang from the finished surface.
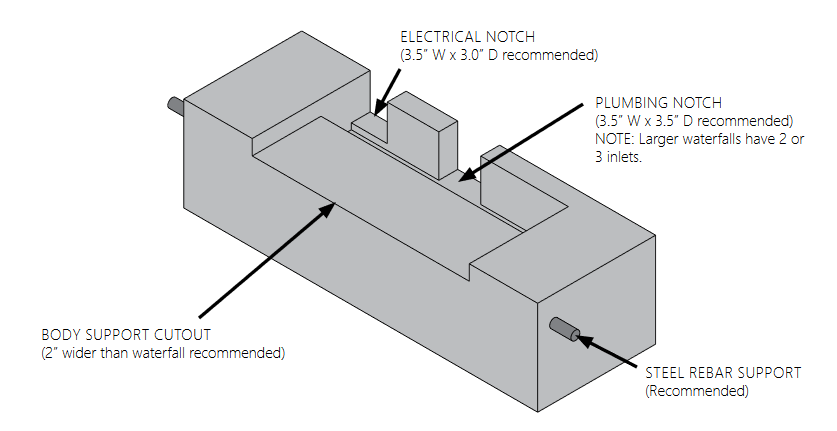
Steel rebar may be used for reinforcement. If using rebar, offset the rebar a minimum of 1″ embedded into the substrate (typically used in concrete).
Plumbing & Electrical Location
A plumbing and electrical notch must be provided.
The foundation = 2″ wider than the overall width of the waterfall
Plumbing notch = 3 ½” W x 3 ½” D in the back center
The electrical notch = 3” W x 3 ½” D from either end
Wall Installation
The wall installation is very similar to the concrete/substrate installation without the forming process. The dimensional requirements for installation will be the same.
In many cases, the waterfall will be supported by the wall structure where notching may not be required. This leaves the back open for electrical and plumbing installation.
Mortar or thin-set should be used to secure the waterfall in place.
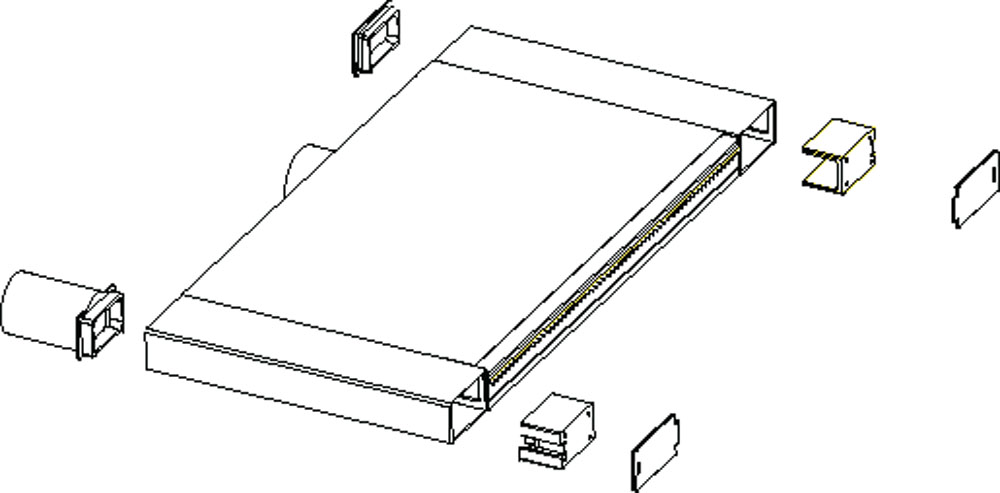
Preparing for Electrical
Choose which side to install the electrical PVC pipe. Either side can be used to accommodate conduit.
Before securing the waterfall completely, glue the Adapter PVC fitting to the back of the waterfall side to where the electrical connections will be made with PVC glue.
Use a rubber mallet to gently tap the square PVC plug into the back of the opposite side for sealing.
Not installing this plug may cause a water leak in the rear of the falls.
Setting the Waterfall
For standard pool applications, the waterfall must be installed before the deck and coping.
Complete the electrical installation steps and plumbing before covering the top deck.
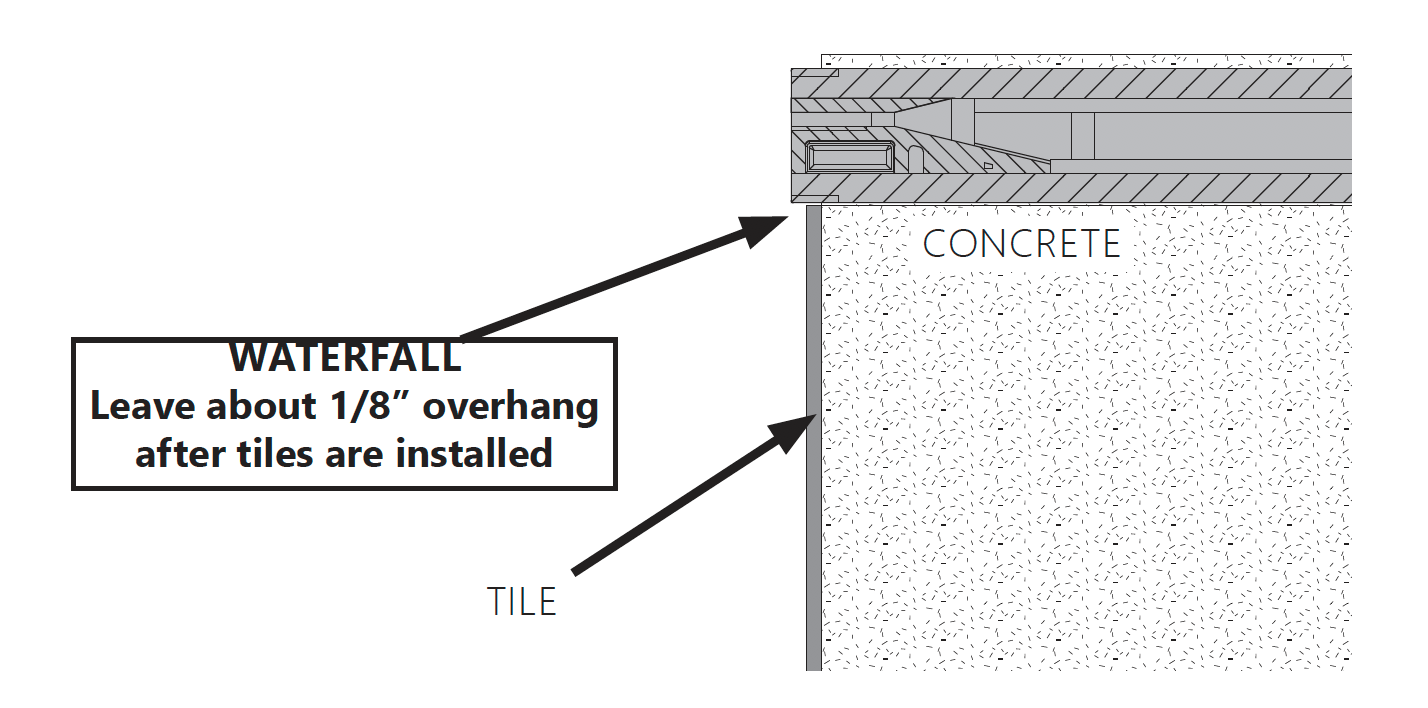
Fill the gaps around the unit with concrete or similar material in preparation for the tiles or other material.
Cut the tile/material to fit under the lip of the waterfall using thin-set or similar substance to secure in place.
Make sure to leave about 1/8” overhang of the waterfall face, after the tiles have been installed.
Ensure the waterfall is level front to back and across the length of the fall. The overhang and level flow help ensure a clean water flow.
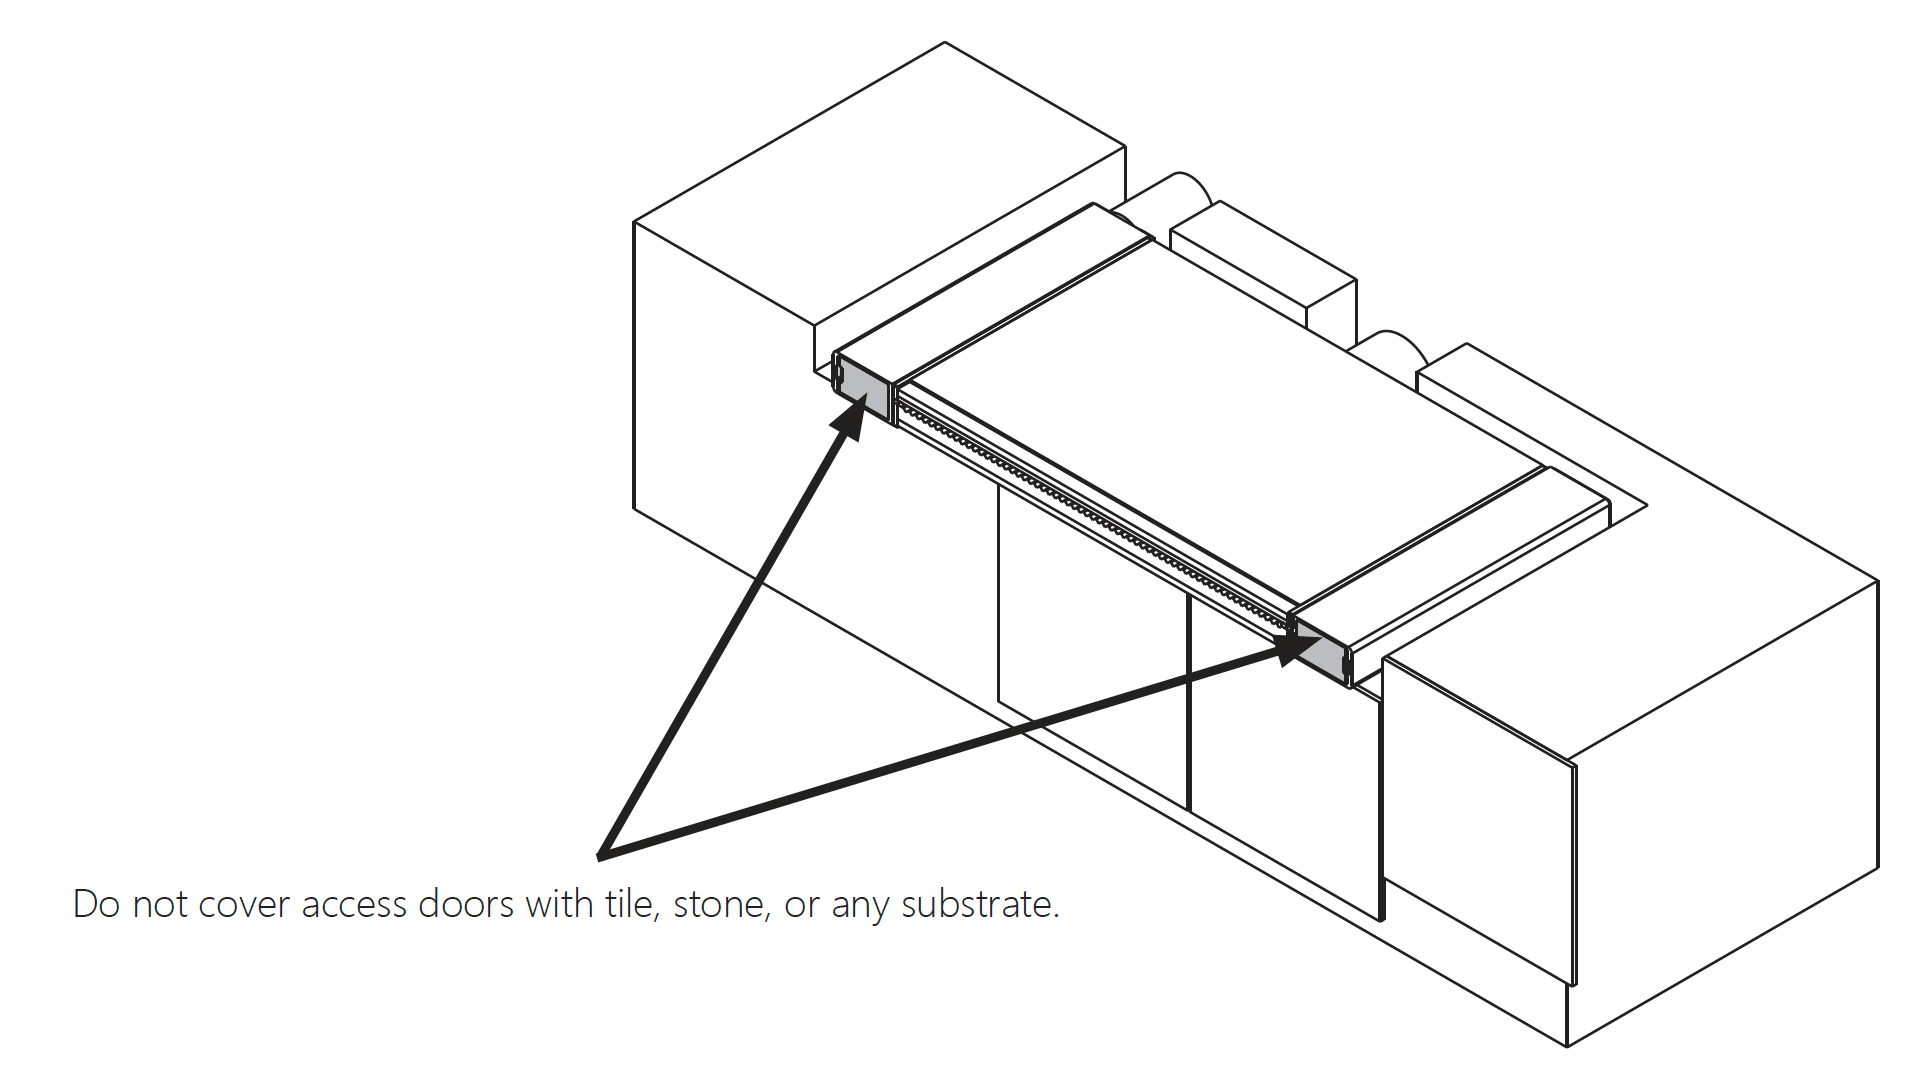
Access Doors
When installing the final facia to the waterfall whether using tile, stone or other substrate, do not cover the access doors.
These will be required for servicing the unit.
![]()
Congratulations!
You have completed this chapter. To go to the next chapter, click next. To go back to the Chapter Table of Contents, click done.